Google Ads
The Google Ads integration supports all four exclusion methods — audience exclusion, IP exclusion, network exclusion, and domain name exclusion. Read on to learn about how to set up your tracking template, and how to configure each of these exclusion types.
Make sure you've already followed the steps to install the Hitprobe tag first.
Tracking template setup
This is an optional step. Hitprobe can still exclude users without it, but analytics and tracking of some clicks will be degraded without it.
Hitprobe relies on a click tracker set as your account-level tracking template so that it can record details of every click, even if the visitor bounces very quickly before the page loads.
The tracking template can easily be added to your whole account without the need to edit individual ads through Google's account-level tracking template setting.
Automatic setup
When you connect (or reconnect) Google Ads to your site, we'll check if the tracking template is found. If not, Hitprobe will offer to set up the template automatically for you.
You can also check the status of the tracking template at any time by going to Manage site > Ad networks, find the Google account, then select Manage > Tracking template setup.
If Hitprobe finds an existing tracking template (from another service, HubSpot for example), Hitprobe will not replace it. In this case, you can either choose to delete the old tracking template and retry, or follow the manual setup steps below.
Manual setup using tracking template
If Hitprobe can't automatically add the template, or if you choose the manual setup option when asked, you'll be shown the tracking template in the console, with the correct site key already in place. You can copy it directly from there.
You can test the tracking template after you've copied it. As long as the tracking template loads your landing page, it's working as expected.
Click tracking not working?
- Check that the site key is correct.
- Is your landing page domain the same as that of the site? You may only redirect to landing pages under your site's domain name (or a subdomain).
- Are there any lower level tracking templates or final URL suffixes that are overriding the account-level settings?
If you're still stuck, remember we're happy to help.
When you have your template ready, head to Google Ads, then select Admin > Account settings > Tracking, and save the template in the Tracking template field. Remember to finally Save.
If you also have tracking templates set up at a lower level, such as in campaign or ad group settings, then those will override this account-level template. To fix this, you'll need to remove those other tracking templates, or replace them with ours.
Manual setup using final URL
If you already use tracking templates on your account, and you can't replace them, you can still use Google Ad's Final URL suffix field to make sure the correct info is available to the Hitprobe tag, without clicks going through our tracker.
If you don't use the click tracker, and the visitor bounces very quickly before the tag gets a chance to load, the click won't be recorded at all. So it's much better to follow the steps above for using the tracking template if possible.
Here is the final URL suffix you'll need:
gclid={gclid}&hp_source={network}&hp_campaign={campaignid}&hp_group={adgroupid}&hp_content={creative}&hp_term={keyword}&hp_placement={placement}
If you already use a final URL suffix, you can add the parameters above alongside those that are already set.
When you have your final URL suffix ready, head to Google Ads, then select Admin > Account settings > Tracking, and save the template in the Final URL suffix field. Remember to finally Save.
Audience exclusion
When a session is excluded by audience, Hitprobe will add the visitor to a Google data segment (audience). This segment can then be excluded from each of your campaigns so those visitors will not see any ads in the future.
When you connect (or reconnect) Google Ads to your site, we'll check if audience exclusion is configured and working. If not, Hitprobe will offer to set up audience exclusion for you.
You can also check the status of audience exclusion at any time by going to Manage site > Ad networks, find the Google ad account panel, then select Manage > Audience setup.
Follow the steps and Hitprobe will create a data segment for you, and associate it as an exclusion to all of the campaigns in your account.
From now on, Hitprobe will add audience excluded visitors to this data segment for you.
If you add new campaigns in future, Hitprobe will periodically recognize them and add the audience exclusion for you.
IP and network exclusion
As long as a Google account is connected to your site, IP and network exclusion is enabled without any further setup.
When a session is excluded by IP or network, the IP or network address is added to Google's IP exclusions list (in Google Ads, Admin > Account settings > IP exclusions). You can see a list of all IPs that are currently excluded in the Excluded IPs section of the Hitprobe console.
IPs are normally excluded within just a few seconds, but Google Ads sometimes takes a few minutes to show the exclusion in their UI.
IP exclusions expire after 30 days by default, but this can be changed under Manage site > General settings.
Google Ads imposes a limit of 500 IPs or networks that may be excluded at any time. When the limit is reached, Hitprobe will expire the exclusion closest to natural expiry to make room for the new IP.
See our user guide to managing exclusions for how to manage IP/network exclusions.
Domain name (placement) exclusion
Once your Google account is connected to your site, domain name exclusion is enabled without any further steps.
When a session is excluded by domain, Hitprobe will add the domain name to Google's placement exclusions list (in Google Ads, Tools > Content suitability > Excluded placements). You can see a list of all domain names that are currently excluded in the Excluded domains section of the Hitprobe console.
The exclusion will be implemented as quickly as possible, usually it takes just a few seconds. Google Ads sometimes takes a few minutes to show the exclusion in their UI.
Domain exclusions expire after 90 days by default, but this can be changed under Manage site > General settings.
See our user guide to managing exclusions for how to manage domain exclusions.
Campaign type limitations
Performance Max
Since Hitprobe applies IP and domain exclusions at account-level, IP & network exclusion and domain name exclusion are supported for Performance Max campaigns.
However, audience exclusion works differently for Performance Max campaigns. You'll need to tell Google to apply a value adjustment to your exclusion audience, to optimize your campaigns away from it.
This is because Performance Max doesn't support excluding by audience the same way other campaign types do. You'll need to tell Google to apply a value adjustment to your exclusion audience, to optimize your campaigns away from it.
You can use this technique if:
- Your Performance Max campaign is optimized for conversion value (i.e. Maximise Conversion Value or tROAS)
- and, your campaign uses top-of-funnel conversions such as page views, button clicks, etc.
It works by applying a 'value rule' of 0.5 to any conversion that happens against an excluded (bad) visit. The maximum value adjustment you can apply is 0.5. So whilst it doesn't cancel out the effect of these conversions entirely, it will help to minimize the effect of poor quality top-of-funnel conversions from unwanted traffic.
Applying the value rule adjustment
- Sign in to Google Ads and go to your Performance Max campaign Settings page.
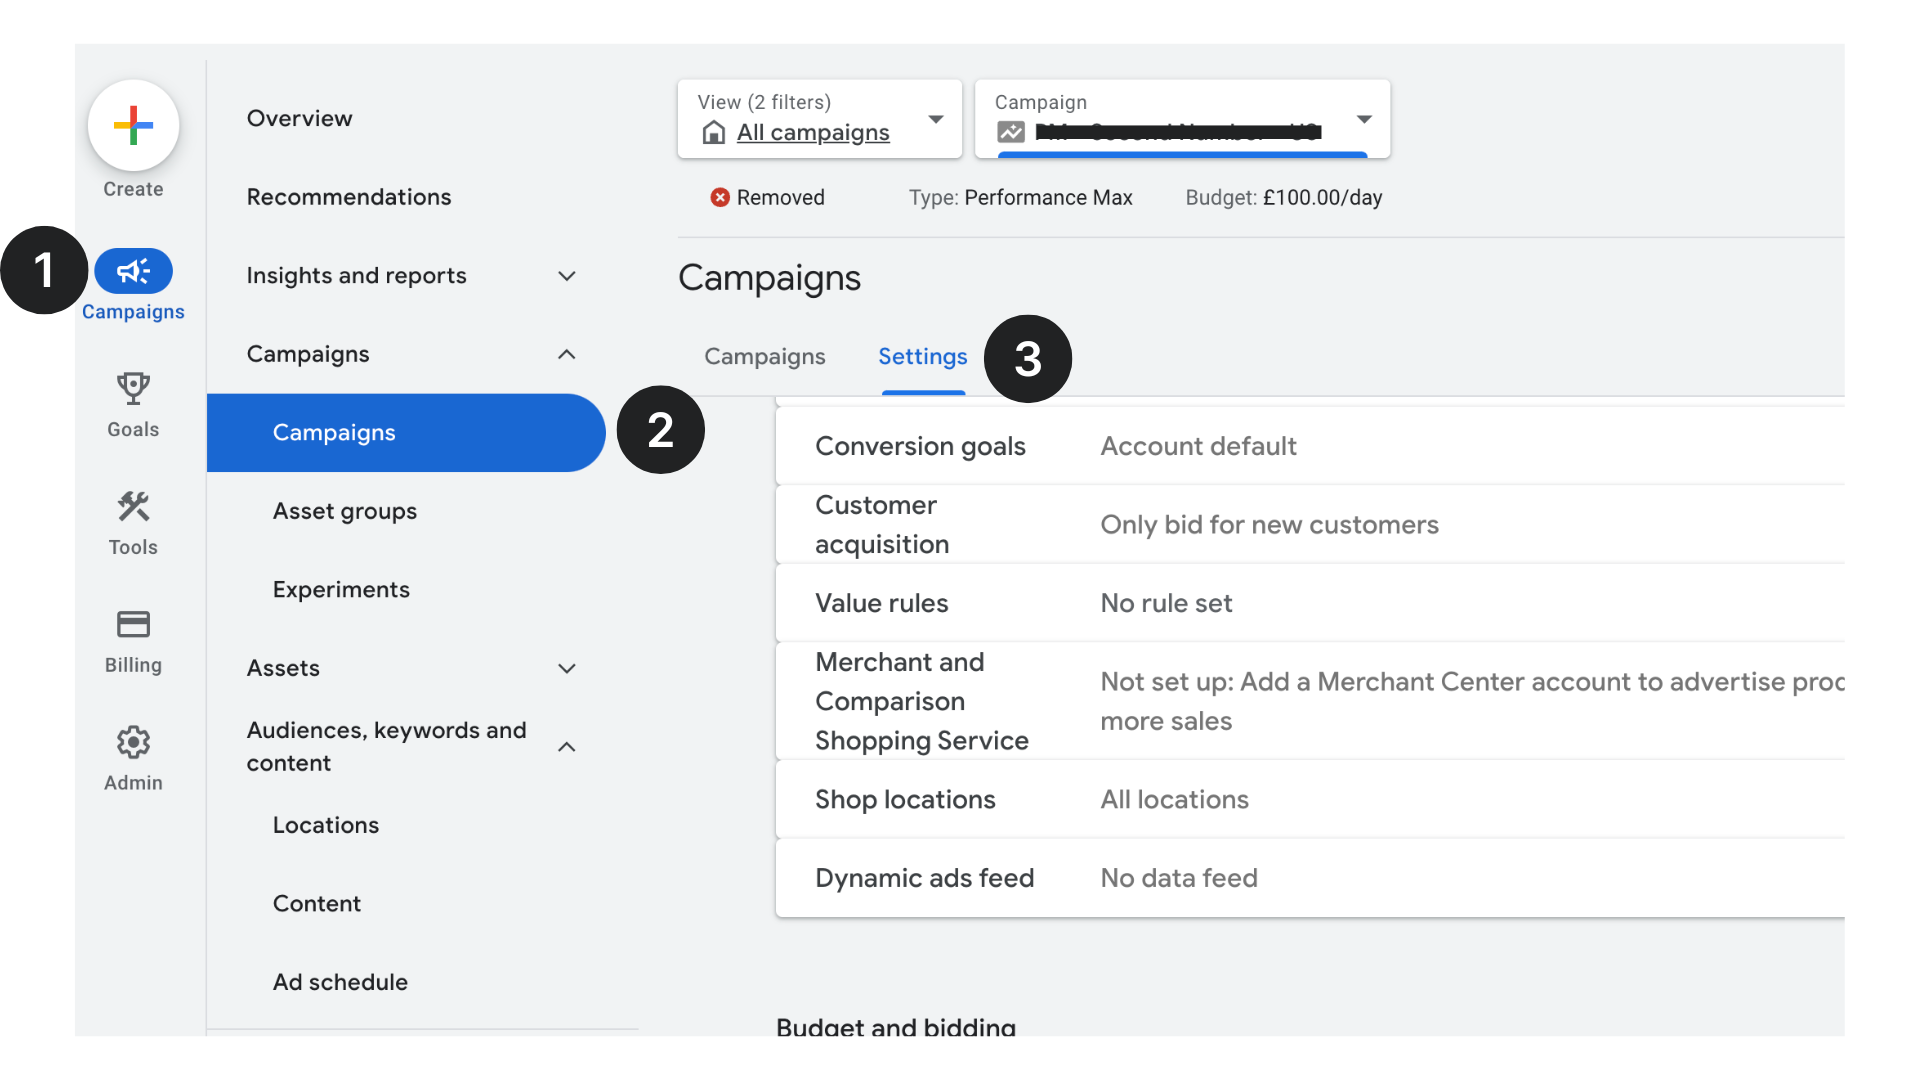
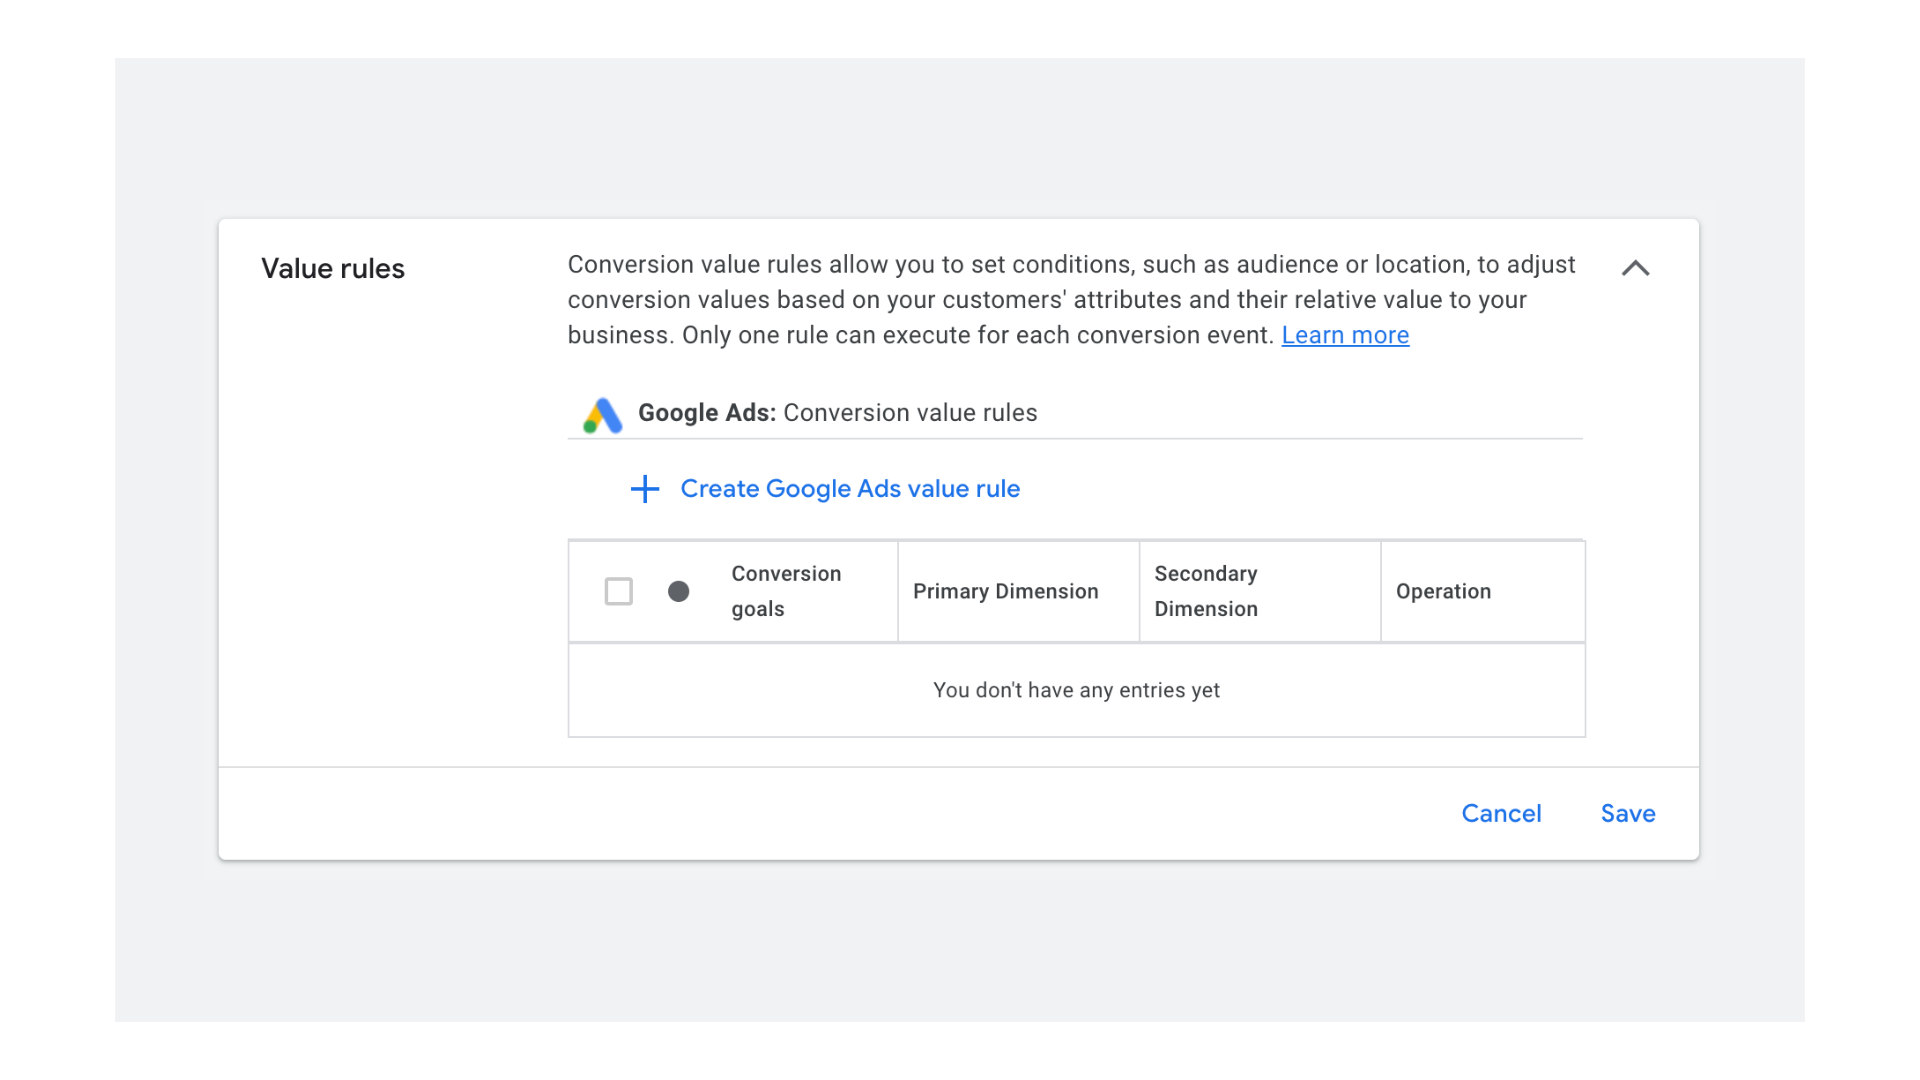
- Expand the Value rules section.
- Click + Create Google Ads value rule.
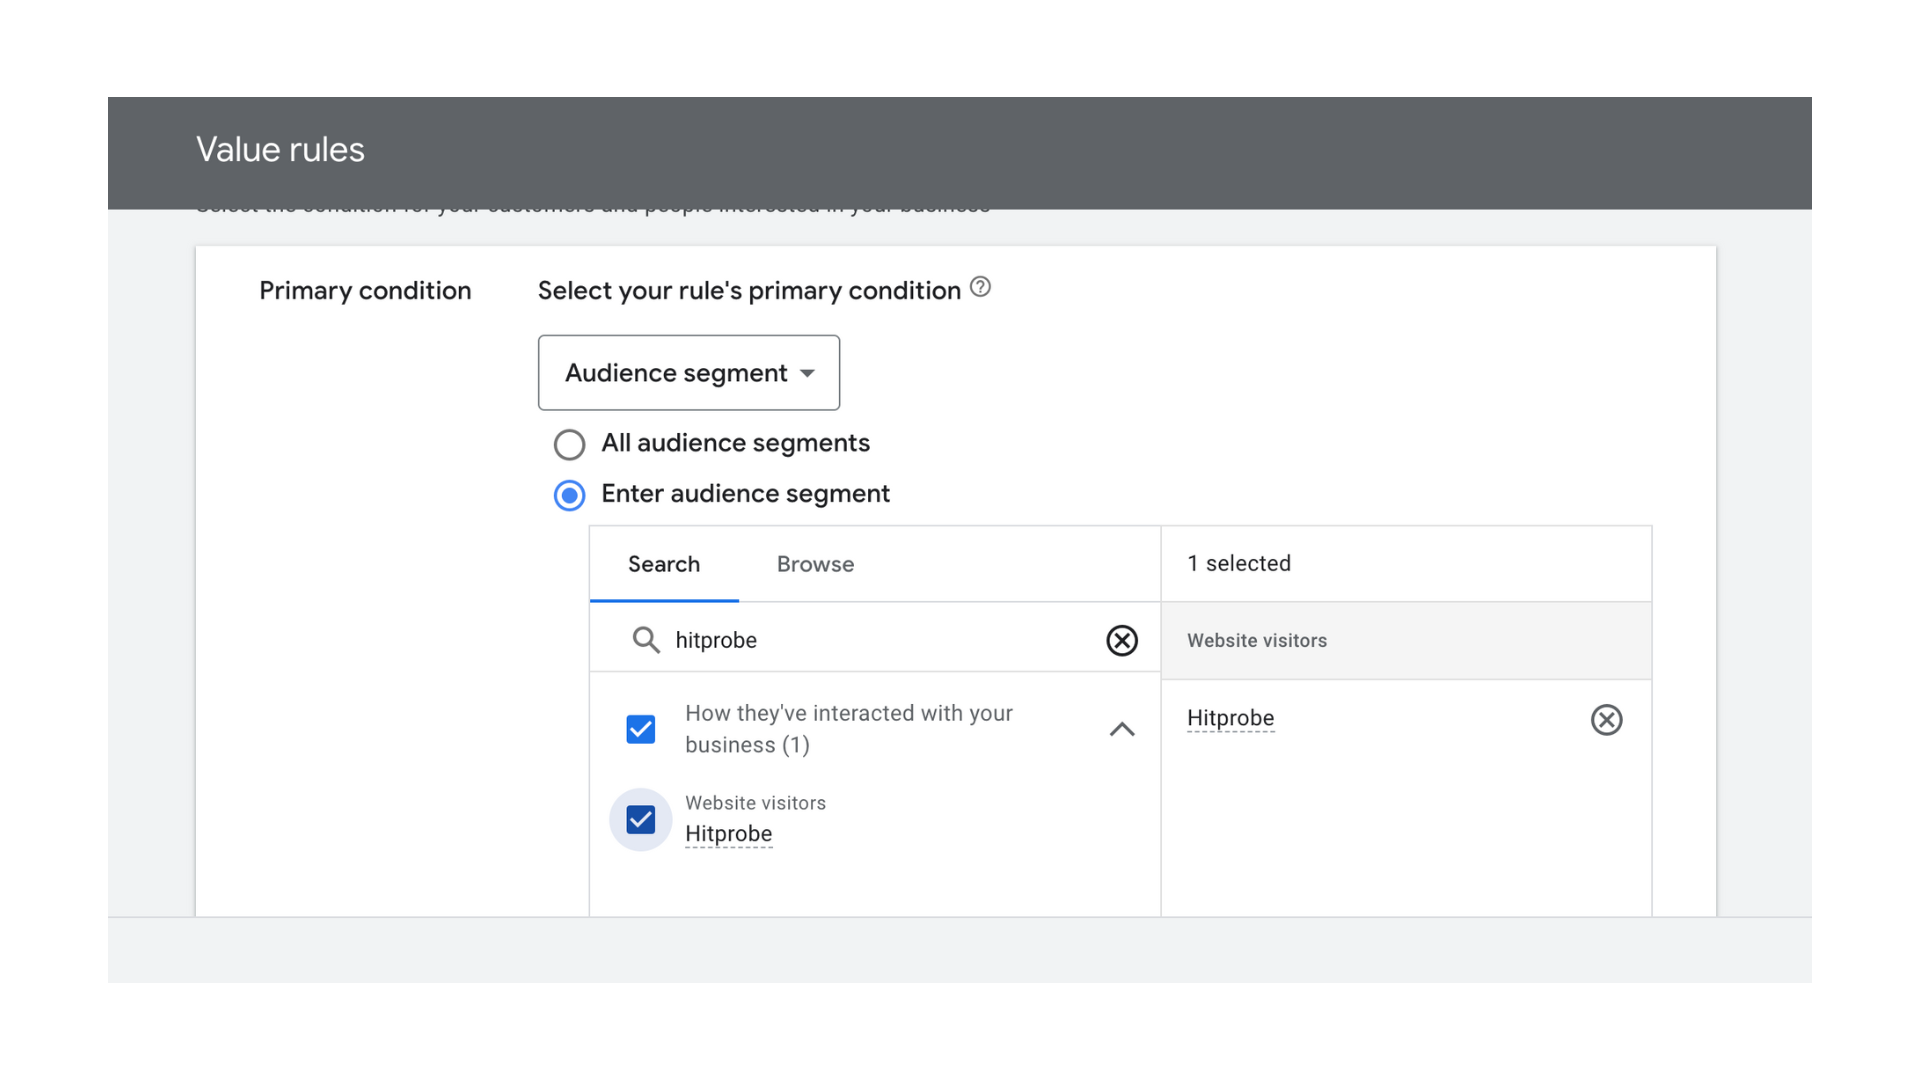
- For Select your rule's primary condition choose Audience segment.
- Search for Hitprobe and then select the Hitprobe Exclusion Audience segment.
- Scroll down to the Value adjustment section, select Multiply, and enter the value 0.5 (this is the minimum allowed). Click Save.
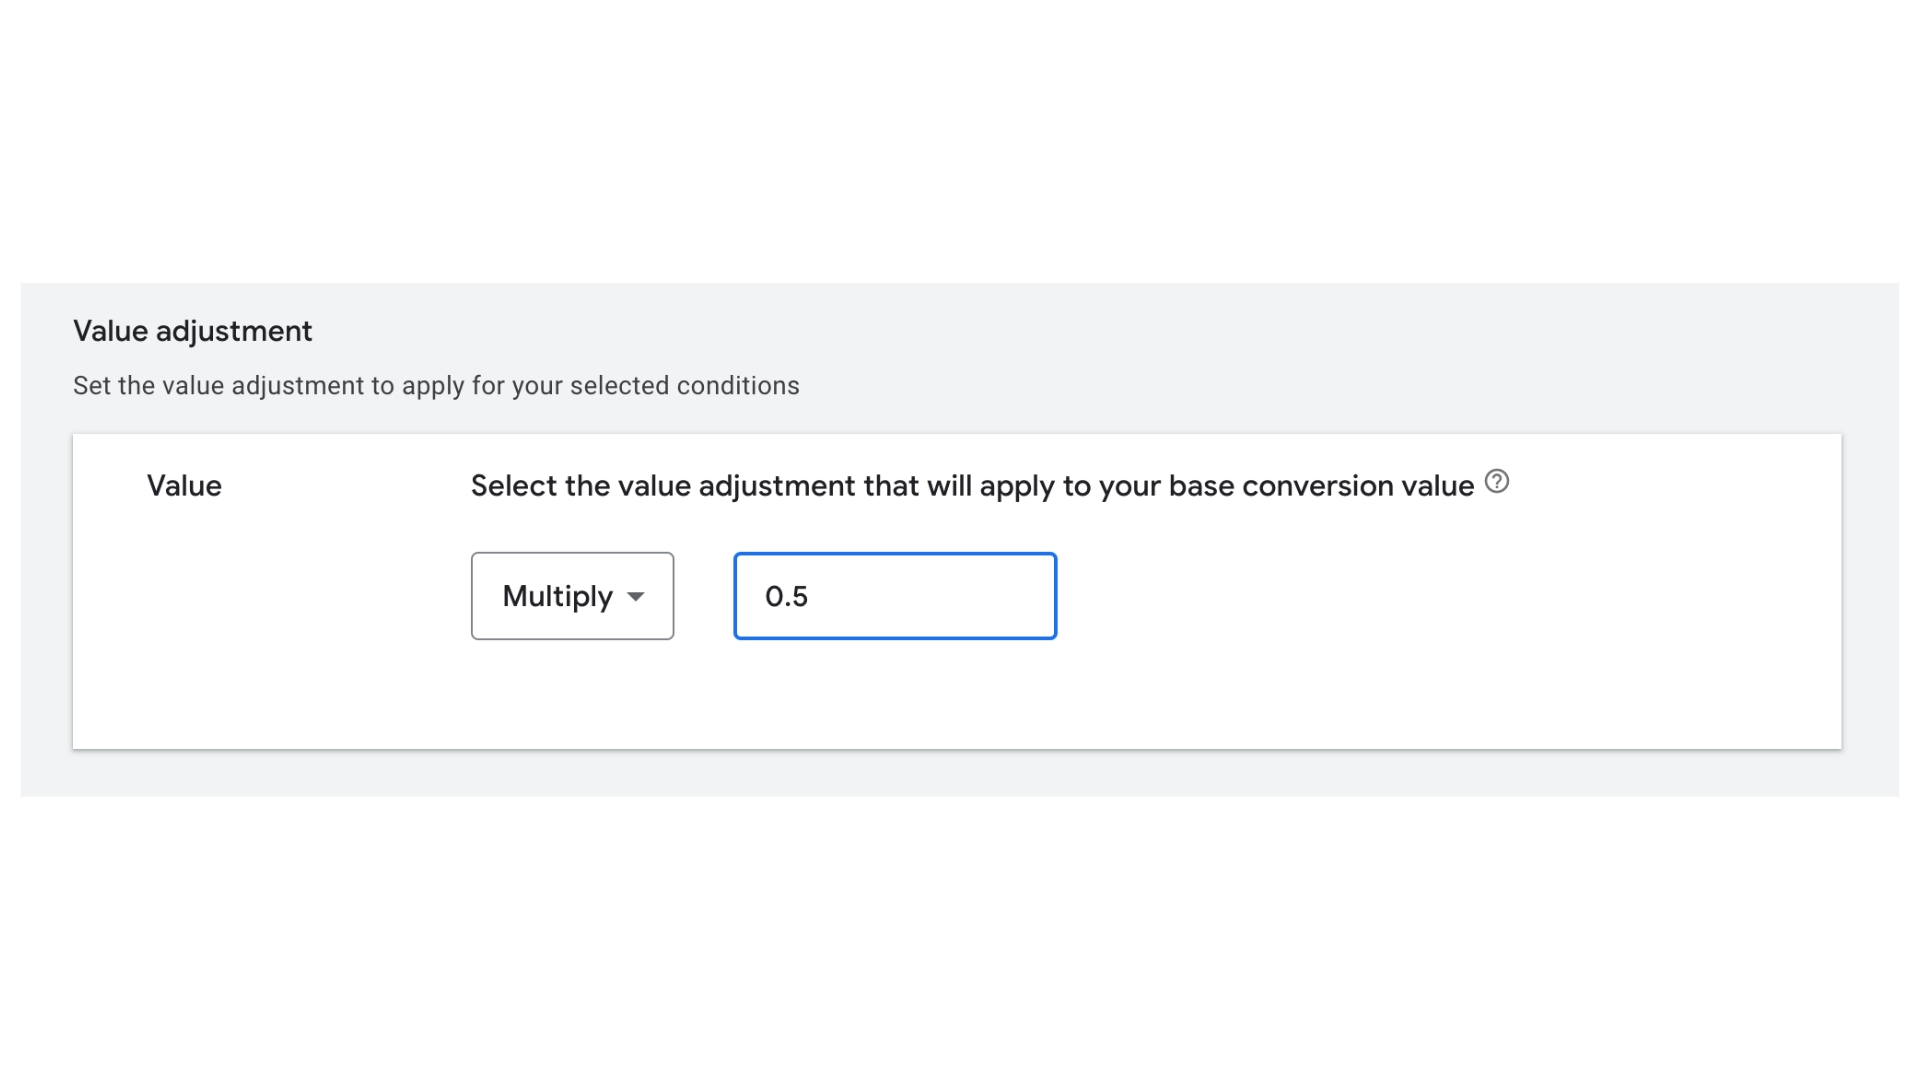
- Finally, back on the Value rules section, click Save.
The Google Performance Max campaign will now apply a lower conversion value to conversions originating from excluded sessions.
Demand Gen
All four exclusion methods are supported for Demand Gen campaigns, however Hitprobe's audience exclusions won't be automatically applied to this campaign type.
After completing the automatic setup for audience exclusion, you will need to create an audience, add the Hitprobe Exclusion Audience segment to it, and then apply it at ad group level as an exclusion to each of your Demand Gen ad groups.
Video (YouTube)
All four exclusion methods are supported for Video campaigns, however Hitprobe's audience exclusions won't be automatically applied to this campaign type.
After completing the automatic setup for audience exclusion, you will need to add the Hitprobe Exclusion Audience segment as an exclusion to each of your Video campaigns. This is due to a limitation of the Google Ads API.